- Messages
- 175
- Likes
- 151
- City
- Not-US
- State
- Non-US
- Country
- Canada
- What I Drive
- 2011 Fiesta SE
Welcome to JP's General Tech on How to properly wash your car.
Refer to my JP's GT Tech Introduction to Detailing 101 for more information on basic detailing tools and items.
Proper care for your car's paint is important to maintaining clarity and shine. As much as the paint, the rest of the car also needs proper care. Clean paint doesn't make a clean car when the tires are brown, or the front wheels are blackened with brake dust. Even bug guts sunburned in can ruin the look of your car. Regular washing involving all its parts can make the task of maintaining a pro look easy. In this thread I will provide a roadmap to a quality cleansing that will keep your car looking ready for cruising the streets. I live in a rural area, 20 min from work, 30 min from downtown. Our cars see regular highway driving, therefore we kill our share of bugs. Our cars will also get gobs of road grease and for those with white cars...rail dust. Add a seasoning of heavy metals, tire grinds, dust/dirt and whatever else you will find if you lick the road surface...It all needs to be cleaned off your car.
I like to clean a car weekly, but sometimes you can go two weeks depending on life, weather and use. Beyond that, I wouldn't call it regular wash maintenance.
Where to begin? You will need a place to do your washing. A wash bay is nice, but not everyone has one. For those who wash outdoors, getting out there early can help. Washing while the temps are cooler and the sun isn't high will give you a wider window to work before things dry out in the sun and heat. In warmer weather, you can modify your wash system by cleaning smaller areas at a time and keeping the whole car wet but the sun will always be your enemy. The best ground would be paved or concrete. If you have a gravel driveway, consider a top layer of 3/4" aggregate. This will reduce tracking dirt inside your car and stop grit particles from splashing up back onto your car. Once washing is complete, move to the shade of a garage or other suitable location.
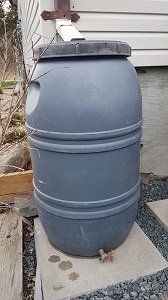
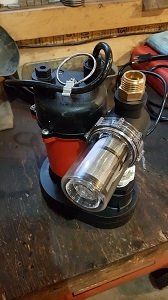
You will need a good supply of water. This is the medium by which most soaps work, therefore as a rule, the dirtier your car , the more water you will use. Most people will probably be on city water which is great for supply and cleanliness but then might have issues with hard water. Hard water will usually require the car being dried manually to avoid water spots. For those on a well (as I am) the idea of endless supply is a dream. I have devised a system by which I collect rain water in either rain barrels or a 1000L/265 gal tote. I can fully wash a car with about 1/2 of a 45 gallon rain barrel of water. I use a 1/2 HP sump pump, a selection of nylon fittings found at the local hardware store to adapt to a garden hose. I also have added an line filter with 100 micron mesh insert. Proper washing can be done, almost anywhere.
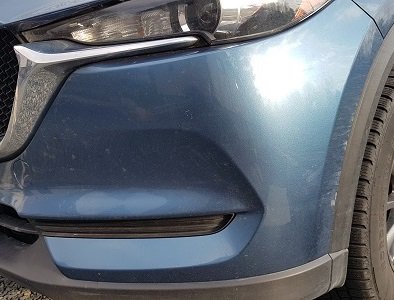
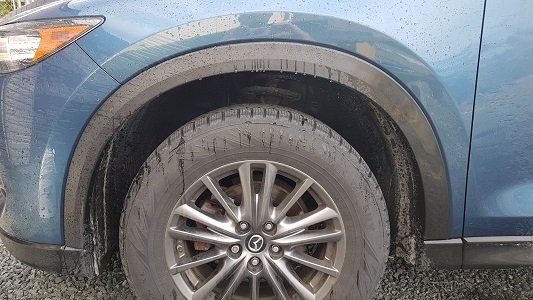
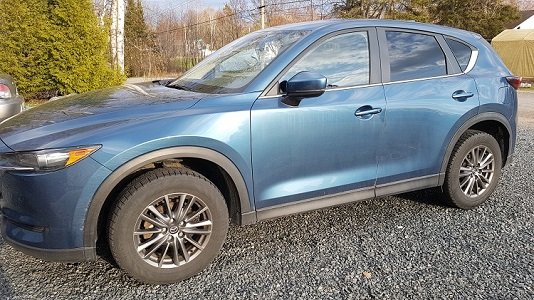
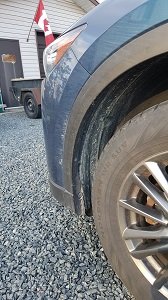
The Size-up - Here is the patient. My wife's '18 CX-5. It has not had a hand wash since last fall. It has had a few trips to the coin-op for a rinse only when really coated in winter salt. I do not use the pre-wash acid cleaners or the soap as the car is already coated in Colinite 476S right before winter.


Process - This is a rundown of the path I follow to do a complete wash. I will expand on each below. Breaking the car into zones allows you to keep up with rinsing while you work to keep the wash solution from drying out.
Wheels, Tires and Wheel well liners.
Roof, Glass, Mirrors and Trunk lid(sedan)/Rear window(wagon/SUV)
Hood and Fenders
Doors & Quarter panels
Grill, Headlights, Front bumper
Rear Panel/Tailgate, Rear bumper
Rocker panels, Rear lower valance, Door jambs
At the end of each section I will list actions for issues that require further detailing processes. Most of these issues can be reduced through regular washing and proper wax/sealer applictions in the future.
I will also include additional quick detail tips to up your detailing game.
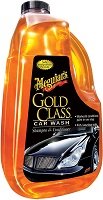
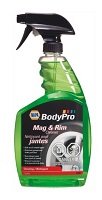
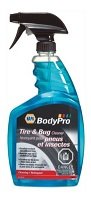
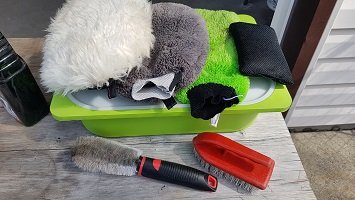
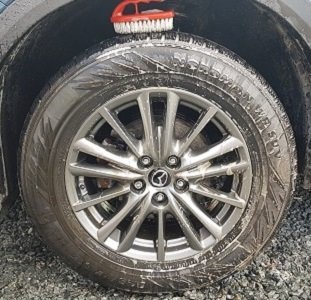
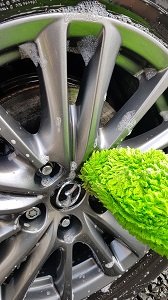
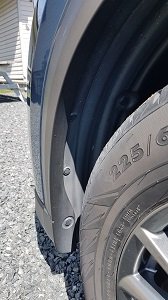
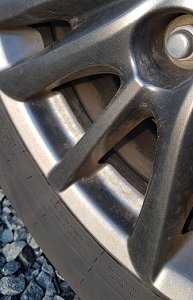
Wheels, Tires and Wheel well liners - I begin the wash process with cleaning the wheels, tires and wheel well liners. I will start by pulling out my white bucket I use for cleaning the wheels and filling it with soap and water (as warm as I can handle). I use a generous amount of soap to create a large amount of suds. My cleaning products of choice here are Meguire's Gold Class Car Wash, NAPA BodyPro Mag&Rim cleaner and NAPA BodyPro Tire&Bug cleaner. I use my dedicated wheel wash mitt, utility brush and rim brush.
>Using your water supply, lightly spray down the area around your wheel. This will dilute any chemicals that get on the paint while you are spraying the wheels. Wheel cleaners are a heavy acid or base solution and Tire protectants have silicone, both of which you don't want on your paint. Try to keep your tires and wheels dry so as to not dilute their cleaners effectiveness.
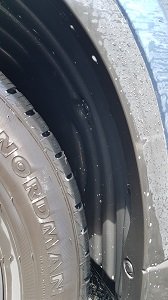
>With my wheel wash mitt and brushes in my soapy bucket I start at the drivers front wheel. I spray a liberal amount of tire cleaner around the tire. Then spray a liberal amount of rim cleaner between each of the spokes and on the surface of the rim allowing it to soak for a couple minutes. Using the utility brush, vigorously scrub the tire sidewall starting at 12 o'clock and working down each side. Scrub as close to the ground as possible. Return to bucket for more soapy solution as required. This will remove the dirt and oxidized outer layer of rubber leaving a clean surface for protectant (for more info, google "Tire browning & Blooming). If you have use tire products before, this will strip away those products along with any dirt or brake dust imbedded in the silicone.
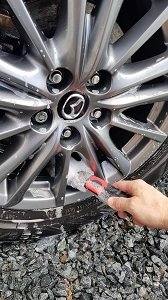
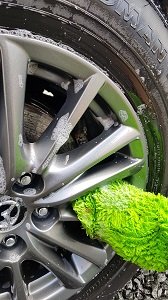
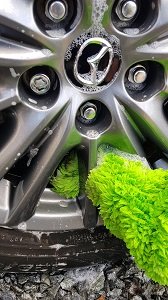
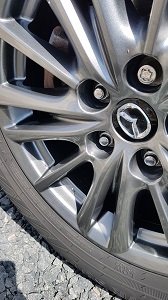
>Next grab the wheel brush and scrub all the way around the rim. Be diligent and scrub every surface starting outside and working in. Use a long brush to clean the inner barrel of the rim. Lastly use your wheel wash mitt to wash over each spoke, reaching around behind each one and between to clean brake dust from behind. Wipe the face clean around each lug nut. Finally rub the tire down with your mitt soaked in wash solution.
>Spray around the wheel opening of your next wheel to be cleaned and apply the tire cleaner and rim cleaner as above. Return to the current wheel and rinse the wheel thoroughly, be sure to spray in between the spokes and flush the lug holes. By the time you have rinsed the 1st wheel, the next wheel will be ready to scrub. Move your bucket to the next wheel to be scrubbed. Repeat the process for the remaining wheels.
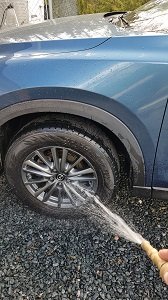
>After all the wheels have been cleaned, Go around to each wheel and clean the plastic inner liner using the wheel wash mitt. Follow with a full rinse, flushing out the wheel wells. Be sure to rinse up around the fender lip as dirt usually can be trapped up there. Flush the little shelf where the rear wheel well meets the rocker panel (and check for rocks, lol). Drain your wheel wash bucket, place items in bottom and submerge them in clean water. Set aside.
>If your wheels aren't clean or tires are still brown, repeat the process. This will subside once you clean your car regularly. A quality tire dressing will reduce the effort required to maintain a clean look as well.
>Alternately, if the wheels are heavily neglected and the front have a thick layer of brake dust, it might be a good idea to start with the rear set as the usually have less buildup.
>You can wax your wheels to help cleaning them easier, with a regular wax or specialized wheel wax.
Roof, Glass, Mirrors and Trunk lid(sedan)/Rear window(wagon/SUV) - For this section I use a "Two bucket method" to wash the car. Essentially I have one bucket of soapy water to rinse my wash mitt (Dirty bucket) and a second bucket of soapy water (as warm as I can handle) to collect wash solution (Clean bucket) to continue washing the car. This system helps to eliminate some of the unwanted abrasive material, removed from washing, from being recycled back onto the car.
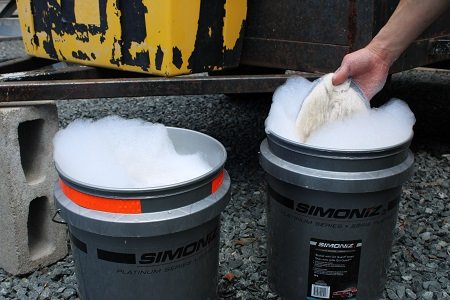
Whenever you return to collect more wash solution in the "Two bucket method", return the wash mitt to the "Dirty bucket". Dunk the wash mitt repeatedly into the Dirty bucket solution, scrubbing with your fingers if necessary to clean and loosen debris. Dunk the mitt into the "Clean bucket" to collect more solution to continue washing. The soap of choice here is Meguire's Gold Class Car Wash. I will use my dedicated CarPro body wash mitt and a bug sponge.
>Here is where we start the process of cleaning the paint. This will be the largest section although I break the car into zones, we will use the bulk of the water in our 2 bucket method. Here we need to be diligent and pay attention to things that could damage the surface. Heavy dirt, natural hazards such as seed pods or leaves, large insect skeletal remains etc.
Thoroughly flush with a heavy stream over the whole car from bottom to top and top to bottom, concentrating on the heavy soiled areas. Be sure to flush in any crevasses where fine dust could collect. The more you can remove or loosen now, the lighter the work will be and the risk damage to the paint reduced.
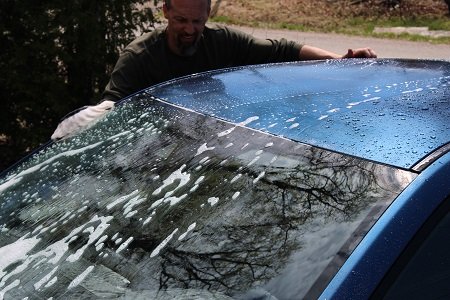
>Soak your wash mitt with clean wash solution and place on the roof of your car. Gently wash one side of the roof on your car. Pay special attention to the roof for sap, it will appear as little tiny dome shaped blobs. If they are recent, you can sometimes remove them with copious amounts of wash solution and lightly passing the wash mitt over the area repeatedly slowly reducing the size of the blob. Resist the desire to use your finger nail to chip it off. Regularly return to your 2 buckets to rejuvenate your wash mitt with fresh solution. Wash the windshield, mirror, side and back windows and/or trunk lid in the same fashion. Use the bug sponge on the windshield to remove stubborn insect remains, also run the sponge down the wiping edge of your wipers. If you are unable to remove bug remains from A-pillars, mirrors and leading roof edge with wash solution, consider applying a bug remover product as per instructions followed by rewashing the area.
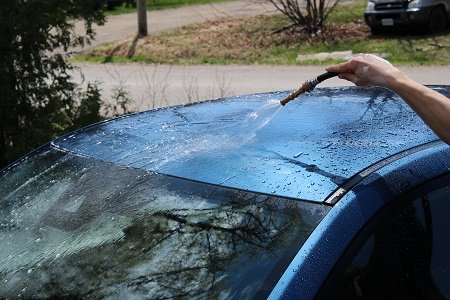
Thoroughly rinse the areas well working top to bottom pushing the soap away in a sheeting motion. Flush well in crevasses, around trim and areas where soap can collect. Repeat for the other side of the car, be sure to overlap your work areas to ensure full cleaning coverage.
>If you are unable to remove sap from your car, I would suggest a clay bar treatment especially for moderately neglected surfaces. Heavy neglect can only be remedied with buffing using a compound. All these will require a proper wax or sealer application after.
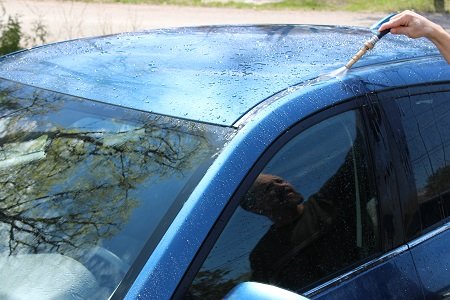
The roof has a recess where the side is welded to the roof, usually covered with a trim piece. This area will collect debris like dirt, seed pods, leaf bits etc. as well as soap. Flushing along the whole trench from one end to the other will help to clear it, reducing build up and clearing soap residue.
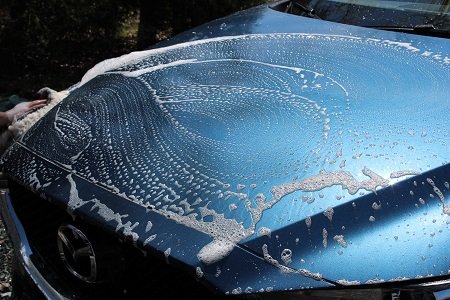
Hood and Fenders - Collect some fresh wash solution from your "Clean water" bucket and apply it to the hood. You can reach all across the whole hood spreading the suds. Be generous along the leading edge where your car will collect bug strikes. Resist the urge to scrub but instead let the wash solution do it's job releasing and lifting the bug guts. Be sure to get into the wiper cowl area where fine dirt can collect and clean the wiper arms. Return to your two buckets for fresh solution and clean each fender working from bumper to door edge and down to the rocker last. If required, with fresh solution, return a do a second pass over the leading edge of the hood.
Now thoroughly rinse the hood and fenders sheeting suds away. Be sure to flush the wipers and wiper cowl area pushing water to the drain points.
>If you are unable to remove insect stains from your car, I would suggest a clay bar treatment. If the stains are permanent, usually due to time, this can only be remedied with buffing using a compound. Both of these will require a proper wax or sealer application after.
>Even if you applied a wax or sealer, every time you wash, misting areas highly susceptible to bug hits with a quick spray wax can top up your existing wax making bug removal easier. Many quick spry waxes can be misted on a wet car and buffed off with a MF towel. For those who track your cars, apply quick spray wax to areas where rubber build up can occur to easy washing after track day.
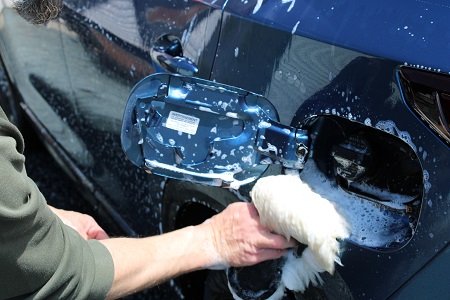
Doors & Quarter panels - Working from top to bottom and front to back, apply wash solution to one side of the car. Use copious amounts of cleaning solution and gravity will help wash away debris and fine material as you massage the doors and quarter panel clean. If your car is particularly dirty below the beltline, separate your wash into top and bottom halves to keep heavy bottom dirt from contaminating the upper portions. Be sure to get a good amount of solution up into the area under the mirror mount around the door handles and watch for lubricant around the lock cylinder. Also, open your fuel door and clean around the opening and back of the door.
Leave the door open during rinsing, and flush from top to bottom chasing suds from window base trim and between door seams.
>You may find black dots or on light colour cars tiny red dots. Do not try to remove them via "elbow grease". Commonly collecting behind the wheels you will find asphalt residue and rail dust. If you can not remove these with regular washing, I would suggest a clay bar treatment. If the stains are permanent, usually due to time, this can only be remedied with buffing using a compound. Both of these will require a proper wax or sealer application after.
>Unfortunately due to temperatures of these contaminants when they become embedded in, there is little that can be done other than a quality wax or sealer application and regular washing. Ceramic coats seem to be the best option to reduce the amount and aid in easier cleaning.
Grill, Headlights, Front bumper - I choose to do the Grill and Front bumper after the sides of the car due to the fact that car front ends receive the brunt of the abuse. This helps to keep contaminants out of your wash solutions for as long as possible. Here you will be trying to work and lift insects from paint, chrome trim and headlights. These surfaces are soft and susceptible to damage through scratches and hazing. special care is needed. Keep applying fresh wash solution regularly and gravity will help flush debris away. If required you can let the wash solution soak for a bit, be mindful that on warmer days your suds will dry up quicker. I will occasionally have to bust out a pick set to remove insect carcasses lodged in the grill and from trim seams. Be sure to clean all the way down including the lower air dam. You may need to get down low and clean under it depending on how it is designed. Rinse the area completely flushing suds from seams between trim and headlights and the bumper and body.
>If you are unable to remove insect stains from your car, I would suggest a clay bar treatment. If the stains are permanent, usually due to time, this can only be remedied with buffing using a compound. Both of these will require a proper wax or sealer application after.
>Even if you applied a wax or sealer, every time you wash, misting areas highly susceptible to bug hits with a quick spray wax can top up your existing wax making bug removal easier. Many quick spry waxes can be misted on a wet car and buffed off with a MF towel. For those who track your cars, apply quick spray wax to areas where rubber build up can occur to easy washing after track day.
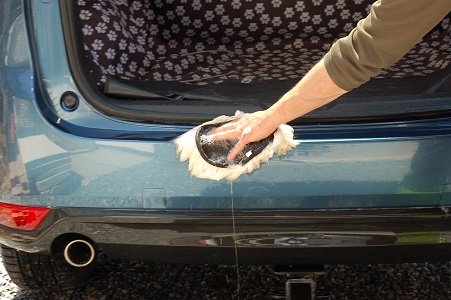
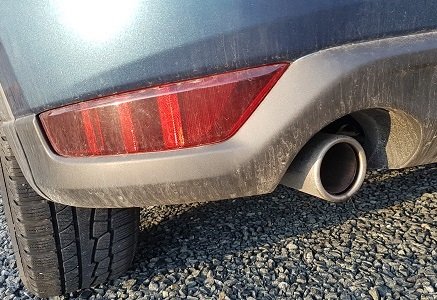
Rear Panel/Tailgate, Rear bumper - Once you have moved around to the rear of the car, apply liberal amounts of wash solution. This area is heavy in fine abrasives that can leave your paint with many micro scratches giving a spider web look or haze in sunlight. These particles get kicked up un the low air pressure area behind your car as you drive. Fine particles will settle in seams, around trim and behind your license plate. More solution will help wash fine materiel out of these areas and away. Work wash solution up under where the trunk latch and tag lights are located, open your trunk/hatch and clean dirt from along the bumper ledge.
Rinse the back area well top to bottom, flushing behind you license plate and up where the tag lights are. Be sure to flush in the seams around the trunk lid or hatch to clean suds and debris that collect there.
Rocker panels, Rear lower valance, Door jambs - I will now grab my #2 wash mitt. This will usually be last years body wash mitt.
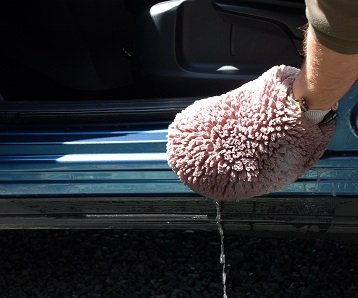
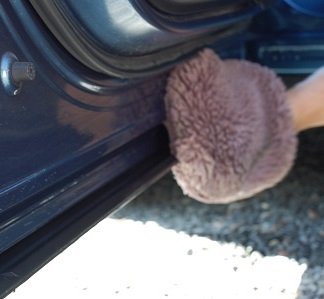
Using the balance of the wash solution I will wash the rocker panels, scrubbing under behind the front wheels all the way to the pinch seam. Clean behind the rear wheels all the way around the rear lower valance. Wash chrome exhaust tip on the outside only, and around the recessed area the protrude the bumper. Open each door and clean along the threshold of the door and the bottom of the door.
Clear away suds and contaminants with a strong pencil spray being mindful to not splash debris back up onto your clean car.
>Even if you applied a wax or sealer, every time you wash, misting areas highly susceptible to road debris and asphalt bits with a quick spray wax can top up your existing wax making debris removal easier. Many quick spray waxes can be misted on a wet car and buffed off with a MF towel. For those who track your cars, apply quick spray wax to areas where rubber build up can occur to easy washing after track day.
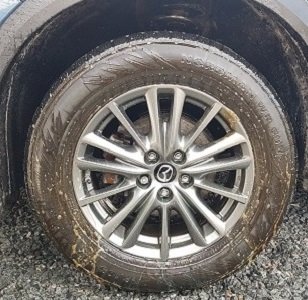
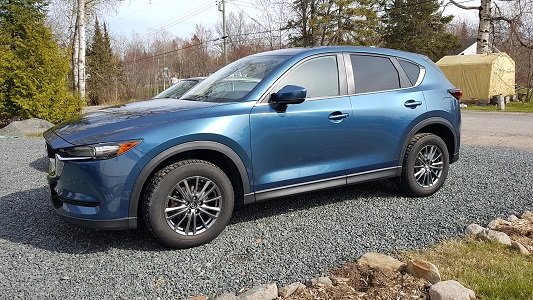
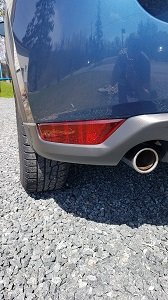
And Now the Reveal, some before and aft pix...
Thank you,
JP
Refer to my JP's GT Tech Introduction to Detailing 101 for more information on basic detailing tools and items.
Proper care for your car's paint is important to maintaining clarity and shine. As much as the paint, the rest of the car also needs proper care. Clean paint doesn't make a clean car when the tires are brown, or the front wheels are blackened with brake dust. Even bug guts sunburned in can ruin the look of your car. Regular washing involving all its parts can make the task of maintaining a pro look easy. In this thread I will provide a roadmap to a quality cleansing that will keep your car looking ready for cruising the streets. I live in a rural area, 20 min from work, 30 min from downtown. Our cars see regular highway driving, therefore we kill our share of bugs. Our cars will also get gobs of road grease and for those with white cars...rail dust. Add a seasoning of heavy metals, tire grinds, dust/dirt and whatever else you will find if you lick the road surface...It all needs to be cleaned off your car.
I like to clean a car weekly, but sometimes you can go two weeks depending on life, weather and use. Beyond that, I wouldn't call it regular wash maintenance.
Where to begin? You will need a place to do your washing. A wash bay is nice, but not everyone has one. For those who wash outdoors, getting out there early can help. Washing while the temps are cooler and the sun isn't high will give you a wider window to work before things dry out in the sun and heat. In warmer weather, you can modify your wash system by cleaning smaller areas at a time and keeping the whole car wet but the sun will always be your enemy. The best ground would be paved or concrete. If you have a gravel driveway, consider a top layer of 3/4" aggregate. This will reduce tracking dirt inside your car and stop grit particles from splashing up back onto your car. Once washing is complete, move to the shade of a garage or other suitable location.
You will need a good supply of water. This is the medium by which most soaps work, therefore as a rule, the dirtier your car , the more water you will use. Most people will probably be on city water which is great for supply and cleanliness but then might have issues with hard water. Hard water will usually require the car being dried manually to avoid water spots. For those on a well (as I am) the idea of endless supply is a dream. I have devised a system by which I collect rain water in either rain barrels or a 1000L/265 gal tote. I can fully wash a car with about 1/2 of a 45 gallon rain barrel of water. I use a 1/2 HP sump pump, a selection of nylon fittings found at the local hardware store to adapt to a garden hose. I also have added an line filter with 100 micron mesh insert. Proper washing can be done, almost anywhere.
The Size-up - Here is the patient. My wife's '18 CX-5. It has not had a hand wash since last fall. It has had a few trips to the coin-op for a rinse only when really coated in winter salt. I do not use the pre-wash acid cleaners or the soap as the car is already coated in Colinite 476S right before winter.
Process - This is a rundown of the path I follow to do a complete wash. I will expand on each below. Breaking the car into zones allows you to keep up with rinsing while you work to keep the wash solution from drying out.
Wheels, Tires and Wheel well liners.
Roof, Glass, Mirrors and Trunk lid(sedan)/Rear window(wagon/SUV)
Hood and Fenders
Doors & Quarter panels
Grill, Headlights, Front bumper
Rear Panel/Tailgate, Rear bumper
Rocker panels, Rear lower valance, Door jambs
At the end of each section I will list actions for issues that require further detailing processes. Most of these issues can be reduced through regular washing and proper wax/sealer applictions in the future.
I will also include additional quick detail tips to up your detailing game.
Wheels, Tires and Wheel well liners - I begin the wash process with cleaning the wheels, tires and wheel well liners. I will start by pulling out my white bucket I use for cleaning the wheels and filling it with soap and water (as warm as I can handle). I use a generous amount of soap to create a large amount of suds. My cleaning products of choice here are Meguire's Gold Class Car Wash, NAPA BodyPro Mag&Rim cleaner and NAPA BodyPro Tire&Bug cleaner. I use my dedicated wheel wash mitt, utility brush and rim brush.
>Using your water supply, lightly spray down the area around your wheel. This will dilute any chemicals that get on the paint while you are spraying the wheels. Wheel cleaners are a heavy acid or base solution and Tire protectants have silicone, both of which you don't want on your paint. Try to keep your tires and wheels dry so as to not dilute their cleaners effectiveness.
>With my wheel wash mitt and brushes in my soapy bucket I start at the drivers front wheel. I spray a liberal amount of tire cleaner around the tire. Then spray a liberal amount of rim cleaner between each of the spokes and on the surface of the rim allowing it to soak for a couple minutes. Using the utility brush, vigorously scrub the tire sidewall starting at 12 o'clock and working down each side. Scrub as close to the ground as possible. Return to bucket for more soapy solution as required. This will remove the dirt and oxidized outer layer of rubber leaving a clean surface for protectant (for more info, google "Tire browning & Blooming). If you have use tire products before, this will strip away those products along with any dirt or brake dust imbedded in the silicone.
>Next grab the wheel brush and scrub all the way around the rim. Be diligent and scrub every surface starting outside and working in. Use a long brush to clean the inner barrel of the rim. Lastly use your wheel wash mitt to wash over each spoke, reaching around behind each one and between to clean brake dust from behind. Wipe the face clean around each lug nut. Finally rub the tire down with your mitt soaked in wash solution.
>Spray around the wheel opening of your next wheel to be cleaned and apply the tire cleaner and rim cleaner as above. Return to the current wheel and rinse the wheel thoroughly, be sure to spray in between the spokes and flush the lug holes. By the time you have rinsed the 1st wheel, the next wheel will be ready to scrub. Move your bucket to the next wheel to be scrubbed. Repeat the process for the remaining wheels.
>After all the wheels have been cleaned, Go around to each wheel and clean the plastic inner liner using the wheel wash mitt. Follow with a full rinse, flushing out the wheel wells. Be sure to rinse up around the fender lip as dirt usually can be trapped up there. Flush the little shelf where the rear wheel well meets the rocker panel (and check for rocks, lol). Drain your wheel wash bucket, place items in bottom and submerge them in clean water. Set aside.
>If your wheels aren't clean or tires are still brown, repeat the process. This will subside once you clean your car regularly. A quality tire dressing will reduce the effort required to maintain a clean look as well.
>Alternately, if the wheels are heavily neglected and the front have a thick layer of brake dust, it might be a good idea to start with the rear set as the usually have less buildup.
>You can wax your wheels to help cleaning them easier, with a regular wax or specialized wheel wax.
Roof, Glass, Mirrors and Trunk lid(sedan)/Rear window(wagon/SUV) - For this section I use a "Two bucket method" to wash the car. Essentially I have one bucket of soapy water to rinse my wash mitt (Dirty bucket) and a second bucket of soapy water (as warm as I can handle) to collect wash solution (Clean bucket) to continue washing the car. This system helps to eliminate some of the unwanted abrasive material, removed from washing, from being recycled back onto the car.
Whenever you return to collect more wash solution in the "Two bucket method", return the wash mitt to the "Dirty bucket". Dunk the wash mitt repeatedly into the Dirty bucket solution, scrubbing with your fingers if necessary to clean and loosen debris. Dunk the mitt into the "Clean bucket" to collect more solution to continue washing. The soap of choice here is Meguire's Gold Class Car Wash. I will use my dedicated CarPro body wash mitt and a bug sponge.
>Here is where we start the process of cleaning the paint. This will be the largest section although I break the car into zones, we will use the bulk of the water in our 2 bucket method. Here we need to be diligent and pay attention to things that could damage the surface. Heavy dirt, natural hazards such as seed pods or leaves, large insect skeletal remains etc.
Thoroughly flush with a heavy stream over the whole car from bottom to top and top to bottom, concentrating on the heavy soiled areas. Be sure to flush in any crevasses where fine dust could collect. The more you can remove or loosen now, the lighter the work will be and the risk damage to the paint reduced.
>Soak your wash mitt with clean wash solution and place on the roof of your car. Gently wash one side of the roof on your car. Pay special attention to the roof for sap, it will appear as little tiny dome shaped blobs. If they are recent, you can sometimes remove them with copious amounts of wash solution and lightly passing the wash mitt over the area repeatedly slowly reducing the size of the blob. Resist the desire to use your finger nail to chip it off. Regularly return to your 2 buckets to rejuvenate your wash mitt with fresh solution. Wash the windshield, mirror, side and back windows and/or trunk lid in the same fashion. Use the bug sponge on the windshield to remove stubborn insect remains, also run the sponge down the wiping edge of your wipers. If you are unable to remove bug remains from A-pillars, mirrors and leading roof edge with wash solution, consider applying a bug remover product as per instructions followed by rewashing the area.
Thoroughly rinse the areas well working top to bottom pushing the soap away in a sheeting motion. Flush well in crevasses, around trim and areas where soap can collect. Repeat for the other side of the car, be sure to overlap your work areas to ensure full cleaning coverage.
>If you are unable to remove sap from your car, I would suggest a clay bar treatment especially for moderately neglected surfaces. Heavy neglect can only be remedied with buffing using a compound. All these will require a proper wax or sealer application after.
The roof has a recess where the side is welded to the roof, usually covered with a trim piece. This area will collect debris like dirt, seed pods, leaf bits etc. as well as soap. Flushing along the whole trench from one end to the other will help to clear it, reducing build up and clearing soap residue.
Hood and Fenders - Collect some fresh wash solution from your "Clean water" bucket and apply it to the hood. You can reach all across the whole hood spreading the suds. Be generous along the leading edge where your car will collect bug strikes. Resist the urge to scrub but instead let the wash solution do it's job releasing and lifting the bug guts. Be sure to get into the wiper cowl area where fine dirt can collect and clean the wiper arms. Return to your two buckets for fresh solution and clean each fender working from bumper to door edge and down to the rocker last. If required, with fresh solution, return a do a second pass over the leading edge of the hood.
Now thoroughly rinse the hood and fenders sheeting suds away. Be sure to flush the wipers and wiper cowl area pushing water to the drain points.
>If you are unable to remove insect stains from your car, I would suggest a clay bar treatment. If the stains are permanent, usually due to time, this can only be remedied with buffing using a compound. Both of these will require a proper wax or sealer application after.
>Even if you applied a wax or sealer, every time you wash, misting areas highly susceptible to bug hits with a quick spray wax can top up your existing wax making bug removal easier. Many quick spry waxes can be misted on a wet car and buffed off with a MF towel. For those who track your cars, apply quick spray wax to areas where rubber build up can occur to easy washing after track day.
Doors & Quarter panels - Working from top to bottom and front to back, apply wash solution to one side of the car. Use copious amounts of cleaning solution and gravity will help wash away debris and fine material as you massage the doors and quarter panel clean. If your car is particularly dirty below the beltline, separate your wash into top and bottom halves to keep heavy bottom dirt from contaminating the upper portions. Be sure to get a good amount of solution up into the area under the mirror mount around the door handles and watch for lubricant around the lock cylinder. Also, open your fuel door and clean around the opening and back of the door.
Leave the door open during rinsing, and flush from top to bottom chasing suds from window base trim and between door seams.
>You may find black dots or on light colour cars tiny red dots. Do not try to remove them via "elbow grease". Commonly collecting behind the wheels you will find asphalt residue and rail dust. If you can not remove these with regular washing, I would suggest a clay bar treatment. If the stains are permanent, usually due to time, this can only be remedied with buffing using a compound. Both of these will require a proper wax or sealer application after.
>Unfortunately due to temperatures of these contaminants when they become embedded in, there is little that can be done other than a quality wax or sealer application and regular washing. Ceramic coats seem to be the best option to reduce the amount and aid in easier cleaning.
Grill, Headlights, Front bumper - I choose to do the Grill and Front bumper after the sides of the car due to the fact that car front ends receive the brunt of the abuse. This helps to keep contaminants out of your wash solutions for as long as possible. Here you will be trying to work and lift insects from paint, chrome trim and headlights. These surfaces are soft and susceptible to damage through scratches and hazing. special care is needed. Keep applying fresh wash solution regularly and gravity will help flush debris away. If required you can let the wash solution soak for a bit, be mindful that on warmer days your suds will dry up quicker. I will occasionally have to bust out a pick set to remove insect carcasses lodged in the grill and from trim seams. Be sure to clean all the way down including the lower air dam. You may need to get down low and clean under it depending on how it is designed. Rinse the area completely flushing suds from seams between trim and headlights and the bumper and body.
>If you are unable to remove insect stains from your car, I would suggest a clay bar treatment. If the stains are permanent, usually due to time, this can only be remedied with buffing using a compound. Both of these will require a proper wax or sealer application after.
>Even if you applied a wax or sealer, every time you wash, misting areas highly susceptible to bug hits with a quick spray wax can top up your existing wax making bug removal easier. Many quick spry waxes can be misted on a wet car and buffed off with a MF towel. For those who track your cars, apply quick spray wax to areas where rubber build up can occur to easy washing after track day.
Rear Panel/Tailgate, Rear bumper - Once you have moved around to the rear of the car, apply liberal amounts of wash solution. This area is heavy in fine abrasives that can leave your paint with many micro scratches giving a spider web look or haze in sunlight. These particles get kicked up un the low air pressure area behind your car as you drive. Fine particles will settle in seams, around trim and behind your license plate. More solution will help wash fine materiel out of these areas and away. Work wash solution up under where the trunk latch and tag lights are located, open your trunk/hatch and clean dirt from along the bumper ledge.
Rinse the back area well top to bottom, flushing behind you license plate and up where the tag lights are. Be sure to flush in the seams around the trunk lid or hatch to clean suds and debris that collect there.
Rocker panels, Rear lower valance, Door jambs - I will now grab my #2 wash mitt. This will usually be last years body wash mitt.
Using the balance of the wash solution I will wash the rocker panels, scrubbing under behind the front wheels all the way to the pinch seam. Clean behind the rear wheels all the way around the rear lower valance. Wash chrome exhaust tip on the outside only, and around the recessed area the protrude the bumper. Open each door and clean along the threshold of the door and the bottom of the door.
Clear away suds and contaminants with a strong pencil spray being mindful to not splash debris back up onto your clean car.
>Even if you applied a wax or sealer, every time you wash, misting areas highly susceptible to road debris and asphalt bits with a quick spray wax can top up your existing wax making debris removal easier. Many quick spray waxes can be misted on a wet car and buffed off with a MF towel. For those who track your cars, apply quick spray wax to areas where rubber build up can occur to easy washing after track day.
And Now the Reveal, some before and aft pix...
Thank you,
JP
Last edited: