• Sign Up! To view all forums and unlock additional cool features

    Welcome to the #1 Ford Ranger Forum and Ford Ranger community dedicated to Ford Ranger owners and enthusiasts. Register for an account, it's free and it's easy, so don't hesitate to join the Ford Ranger Forum today!


The Taurus Fan Project - System: Taurus E-Fan, Volvo Relay, BMW Sensor

Messages
116
Likes
13
#1
I thought I would show what I am doing with my install of the Taurus fan. I chose the Taurus fan because it really sucks. Sucks a lot of air through the radiator that is (don't know the CFM, sorry). I've searched high and low for a cost effective suitor to control thisTaurus fan I bought. The best method I've found to achieve my goal is using the fan control relay out of a 93-97 Volvo 850 (part number 1398845). The reason I really like this option (besides cost) is that it will run both speeds of the fan. Most of the controllers I looked at only use one speed. To run both speeds though, it requires a trigger for each speed. Enter the BMW switch. These can be found on the 96-98 318I, 95-99 318TI, and the 96-98 Z3. The other nice thing about these switches is the fact you can get it in two temp settings, depending on the thermostat you are running. One switch (part# 61318361787) has the low speed kick on at 180F, while the high kicks in at 195F. The other switch (part# 61311378073) has the low speed kick on at 195F, while the high kicks in at 210F. I run a 180 thermostat, so I went with the first switch.

EDIT: The part numbers for the BMW Sensor connector are below in BOLD (It come in pieces, and needs assembled)

#61131378412 - BMW 90 degree angle connector (Wire Housing - Black Plastic)
#61130007445 - BMW 90 degree angle green connector wires (Need 2)
#61130007446 - BMW 90 degree angle green/black connector wire (Need 1)


All of it is exceptionally cheap considering they are dealer only. I got all of it for under 10 bucks.


Update (10/7/14):

For a 180 Thermostat, use BMW part# 61318361787
For a 194 Thermostat, use BMW part# 61311378073


Here is what I've gathered so far:

I have a new stock warranty replacement (FREE) aluminum radiator , and the Taurus fan (9 dollars out the door) sitting next to it. The Taurus fan covers a good portion of the radiator. I'm thinking I will try it like this to begin with, and possibly incorporate it into the factory shroud later.


Here is the relay I am using from a 97 Volvo 850. On the Volvo, this unit located on the underside of a panel that sits directly above the fan. That may be useful to someone... I scratched my head for a bit before I realized it was there.


MORE TO COME!

I would also like to thank the author of this thread over on nastyz28.com - http://www.nastyz28.com/forum/showthread.php?t=200028 - this thread greatly aided in my decision.
 
OP
MustangShane
Messages
116
Likes
13
Thread Starter #2
I started out with intentions of just mounting the Taurus fan right to the radiator, as is. I even went as far as mounting my overflow to the Taurus shroud. The overflow looked really stupid.... and I despise the metal strapping look - this isn't a farm truck.


But then I leaned the Taurus fan up against my factory shroud. My eyes got big, and oliver sudden it hit me..... that baby sits right in there. So, I eyed it all up and noticed it would fit rather well if I just trimmed it down. It's hard to explain where I cut it exactly, but there are a few different "levels" of material. I cut the lip off of the lowest point, and just followed that line throughout. I also trimmed a corner to help it fit my shroud better. Here is what I trimmed off - and I did it all with my "Multi-Tool" from Harbor Freight.


Here it is mounted into the shroud. I just ran to Lowes and got some more bolts and nylon nuts for it. In this pic, I only have four 1/4-20 bolts holding it in. Also, I reclocked the motor so the wires are facing the drivers side . I may move it one more position clockwise.


This is how it fits. I really like this "factory" look better.


Here is the clearance I've got.

 
OP
MustangShane
Messages
116
Likes
13
Thread Starter #3
Forgot to post this above. I did a test on the motor as well:

[youtube]mZ6xu1KhhHE[/youtube]

Here is a picture showing where I mounted it:


And what the final product looks like installed. I really like being able to have the overflow bottle in the correct location.


OP
MustangShane
Messages
116
Likes
13
Thread Starter #4
I went and got a 3/8" NPT to 1/8" NPT adapter. I drilled it out with a 1/2" bit and tapped it to an M14 X 1.5mm thread. This is what it looked like: (Also, the first pics taken with my new Galaxy SIII).


Notice I said "looked like" above. That's because it was so thin that it broke of in the housing when I was tightening it up (I snugged it up really good, oops). Maybe I should have used steel. But it luckily broke off with the threads flush with the top of the thermostat housing. BONUS - more clearance. Here she is, and what a PITA it was to tighten it.

 
OP
MustangShane
Messages
116
Likes
13
Thread Starter #5
I had planned on using a starter solenoid, fender well type, as a relay for the fan. Then I read that they aren't rated for continuous duty. So, I ordered this 80 amp continuous duty bad boy instead. And it's cheaper. It has a 5 star rating, 11 out of 11 reviews.


80 AMP RELAY 12 VOLTS : Amazon.com : Automotive

It was 16 dollars, with 2 day shipping. I read a couple of the comments. One guy is using it on a Mark VIII fan, so it will be great for a Taurus fan.

I also ran across some info on actual cfm on these fans. Running by alternator, this guy tested the fan at 3000 cfm on low, and 6000 cfm on high.

http://forums.trailvoy.com/showpost.php?p=728594&postcount=125
 
OP
MustangShane
Messages
116
Likes
13
Thread Starter #6
This project got kicked into high gear when the transmission decided to take a dump in our Escape. My Wife has temporarily assumed the F150 until we get it back (hopefully Saturday). So, in other words.... I didn't get to be AS thorough as I would have liked, but I will go back over it in a few days.

This is some of what I've done. Project is incomplete until the 80 amp relay arrives.

I'm not sure that this will be the final home for the breaker, but it works for now.
[


I ran the power over to the passenger side, under the MAF sensor.


I used the bracket and former home of the A/C relay to mount the Volvo relay. The wire loom you see coming in from behind the alternator goes up to the BMW switch.


And here's the switch wired up. I actually wound up using spade connectors instead of the pieces listed in the thread I posted. Those were entirely too small to fit the pins.


This bad boy just arrived. Looks like a really good unit.


Here it is installed and a few other pics.... all it needs is a simple green bath now.


OP
MustangShane
Messages
116
Likes
13
Thread Starter #8
I was asked about doing a schematic, so here it is. Let me know if you have any questions. The Taurus fan motor wire colors vary, so I didn't bother with that in the schematic.

 
OP
MustangShane
Messages
116
Likes
13
Thread Starter #9
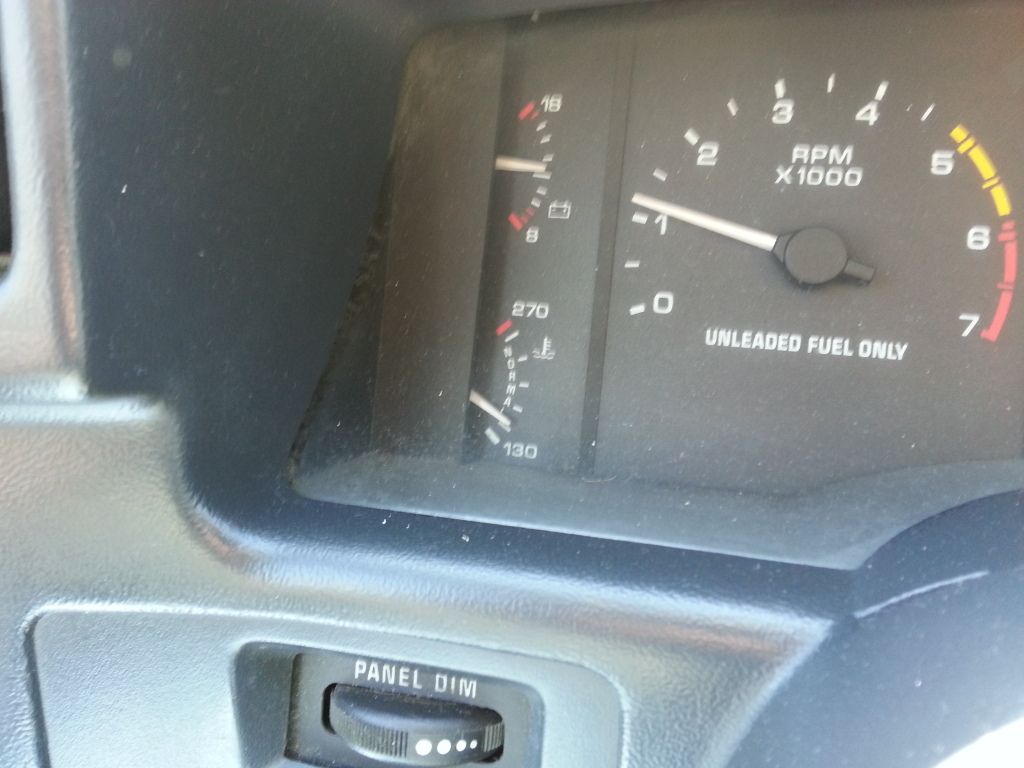
As some of you may know, the temps are rising here in the desert. So far sad so good with this setup. I got on it pretty good on the freeway last night, and the temp went up a bit - as it always has. Before, the recovery time was either several minutes, or it wouldn't cool down until I shut the motor off. Last night it came right back down in a matter of seconds.

This is where the gauge sits most of try the time.


Sent from the can


Top